


How to use:
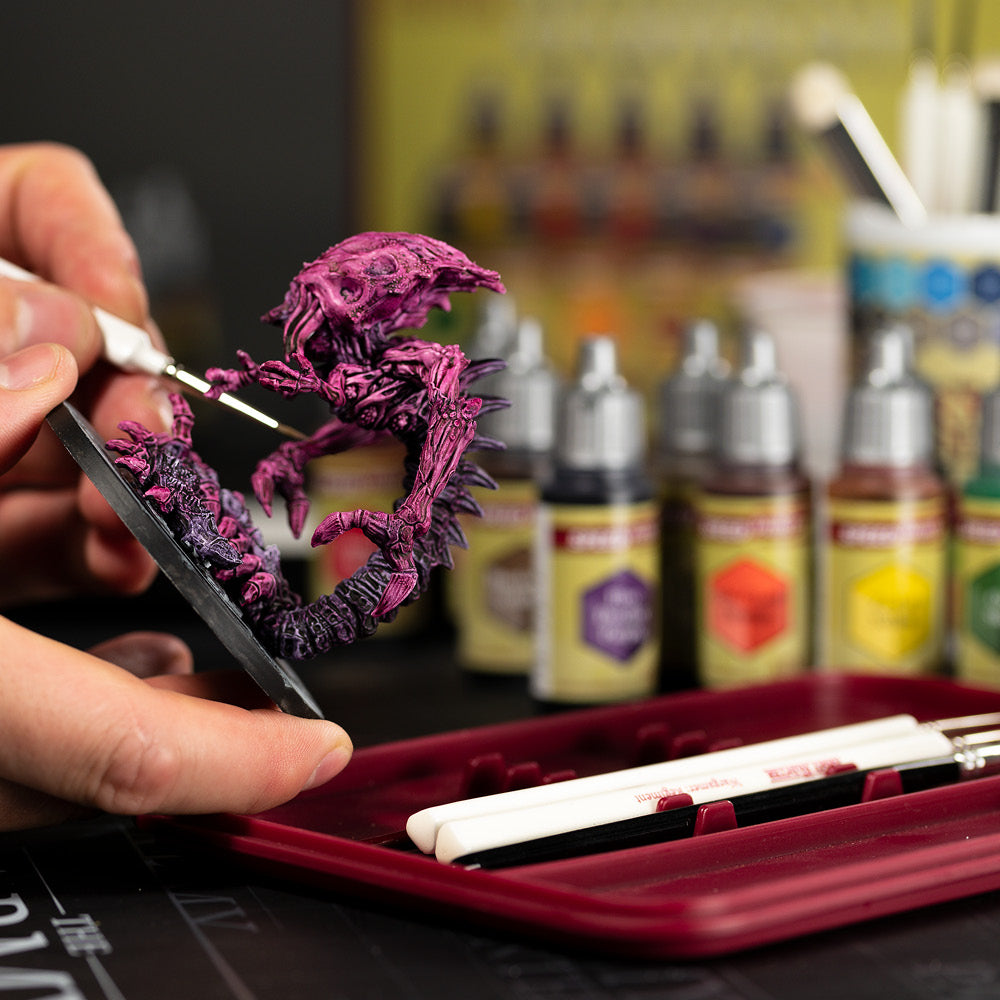
Speedpaint 2.0
Are you new to the hobby of painting miniatures?
Then we know the idea and prospect of painting intricate details on such small surfaces can be intimidating.
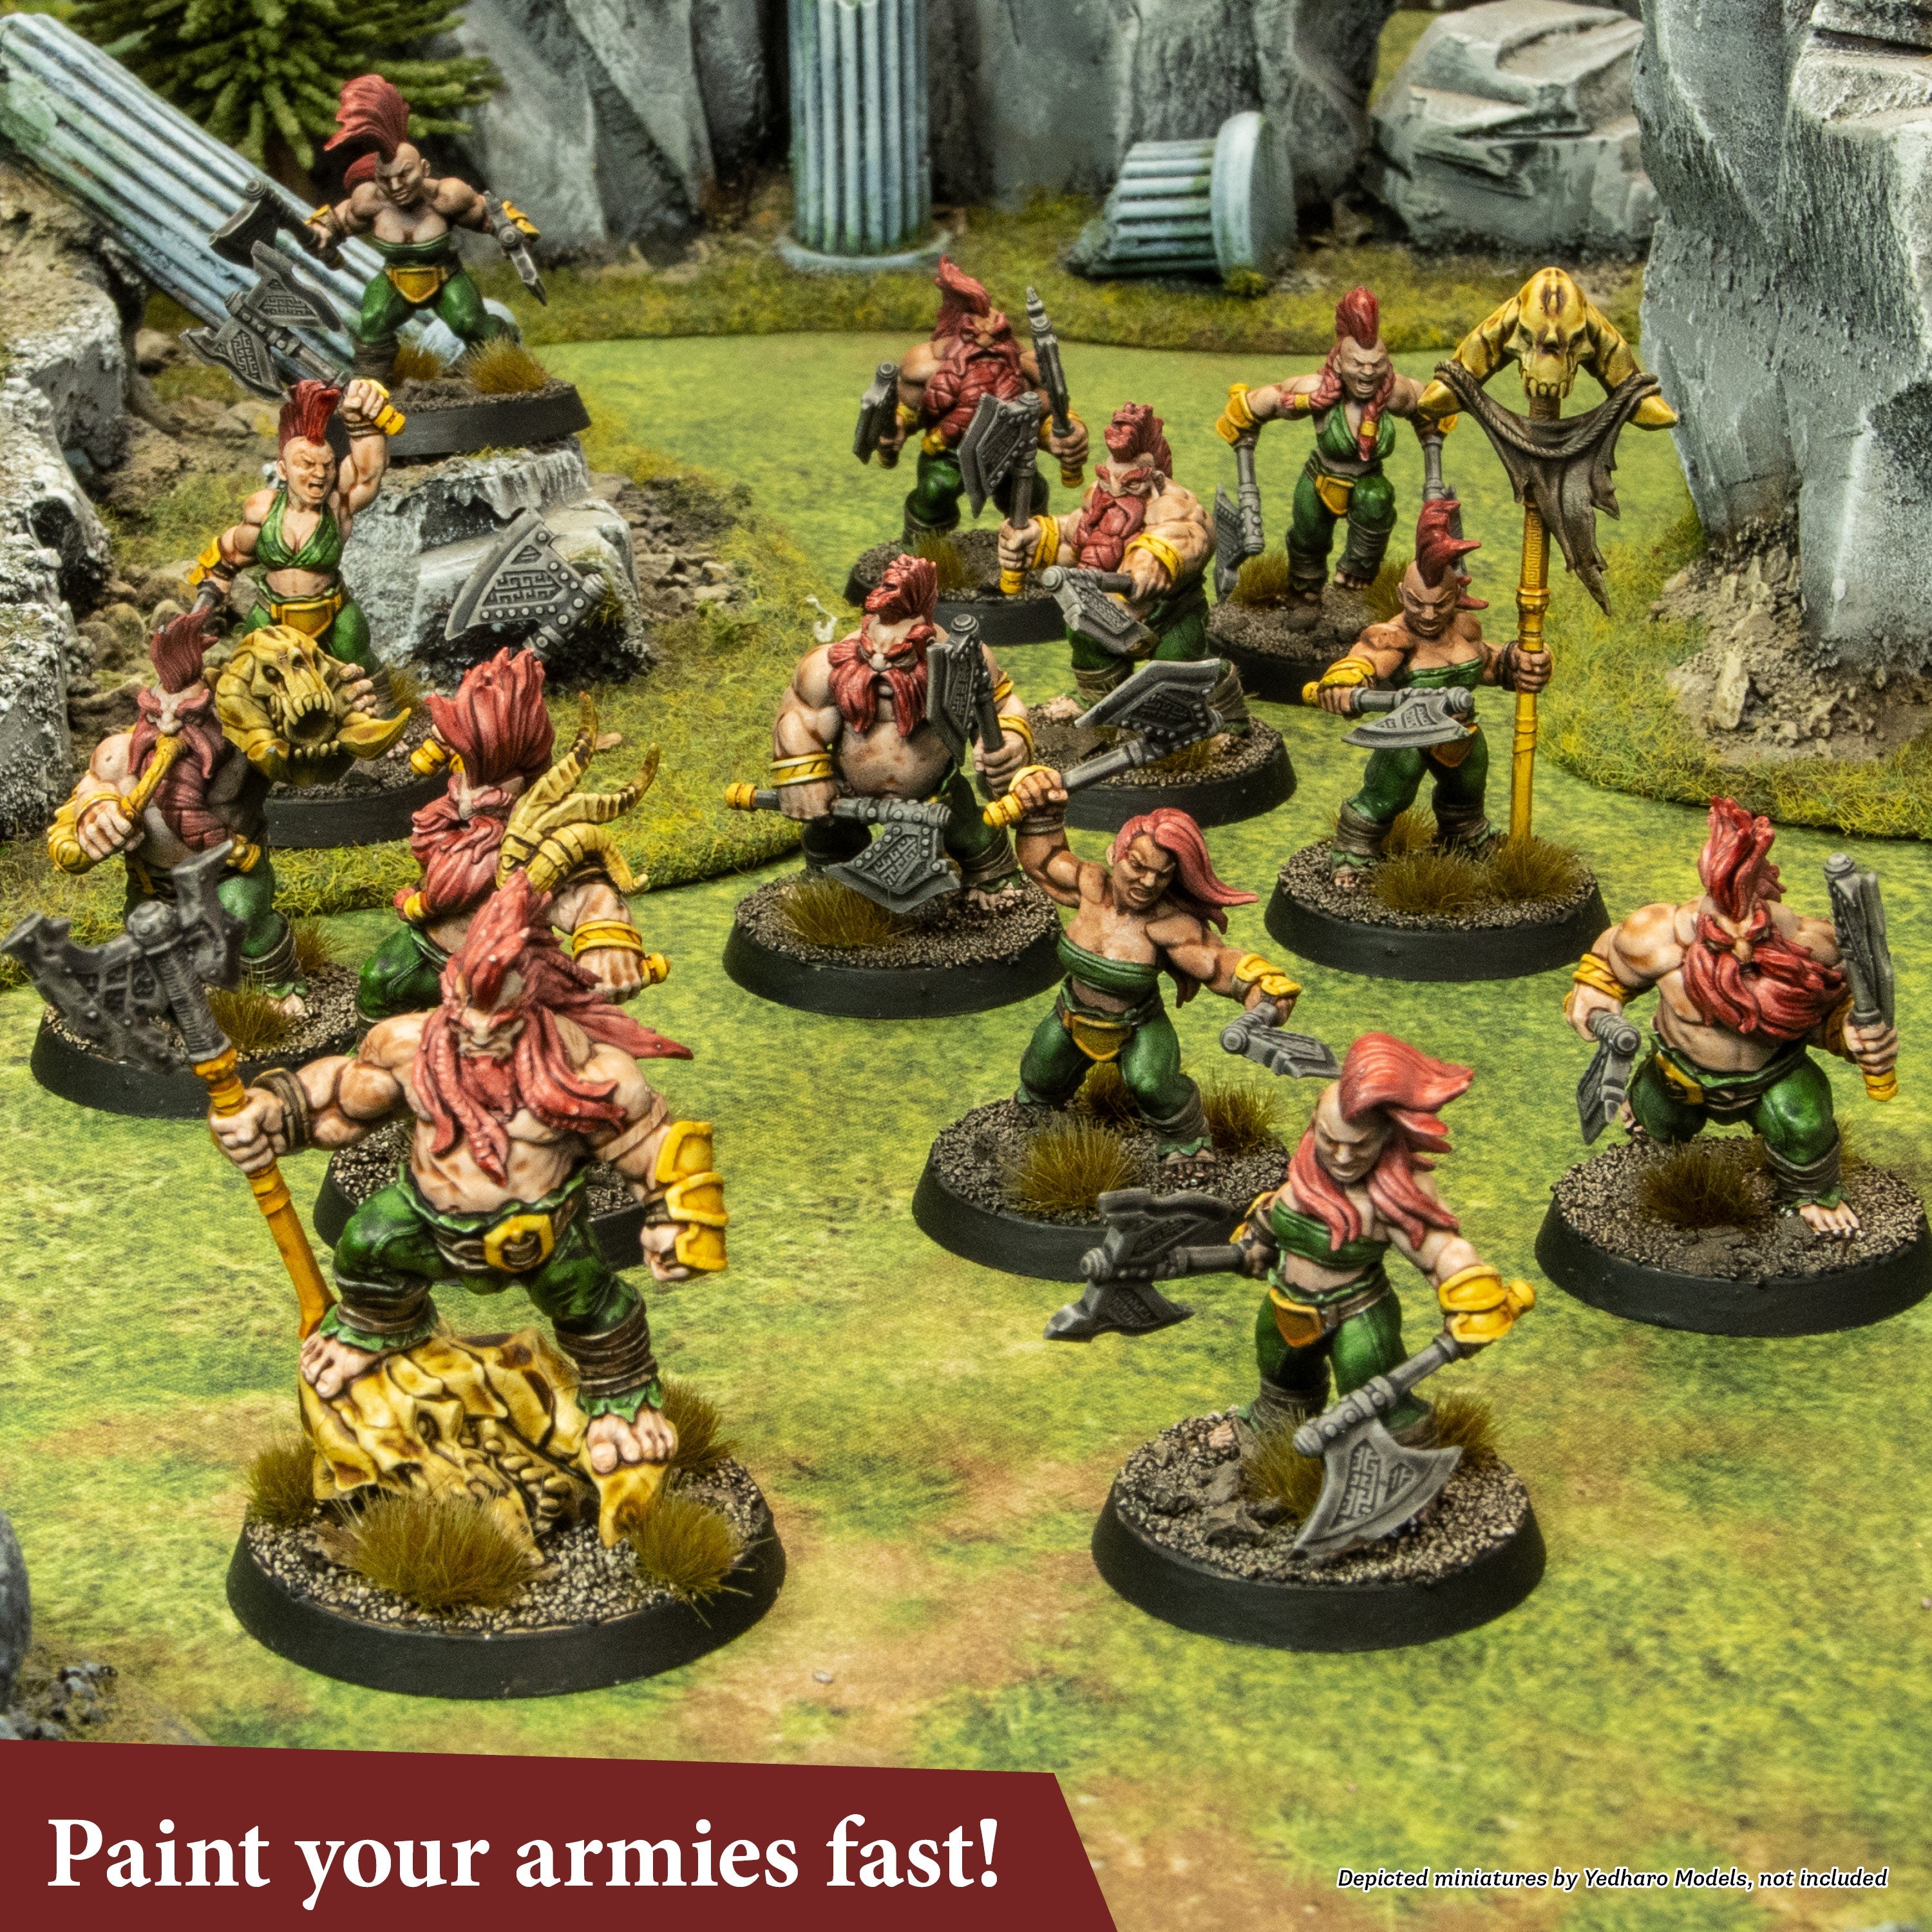
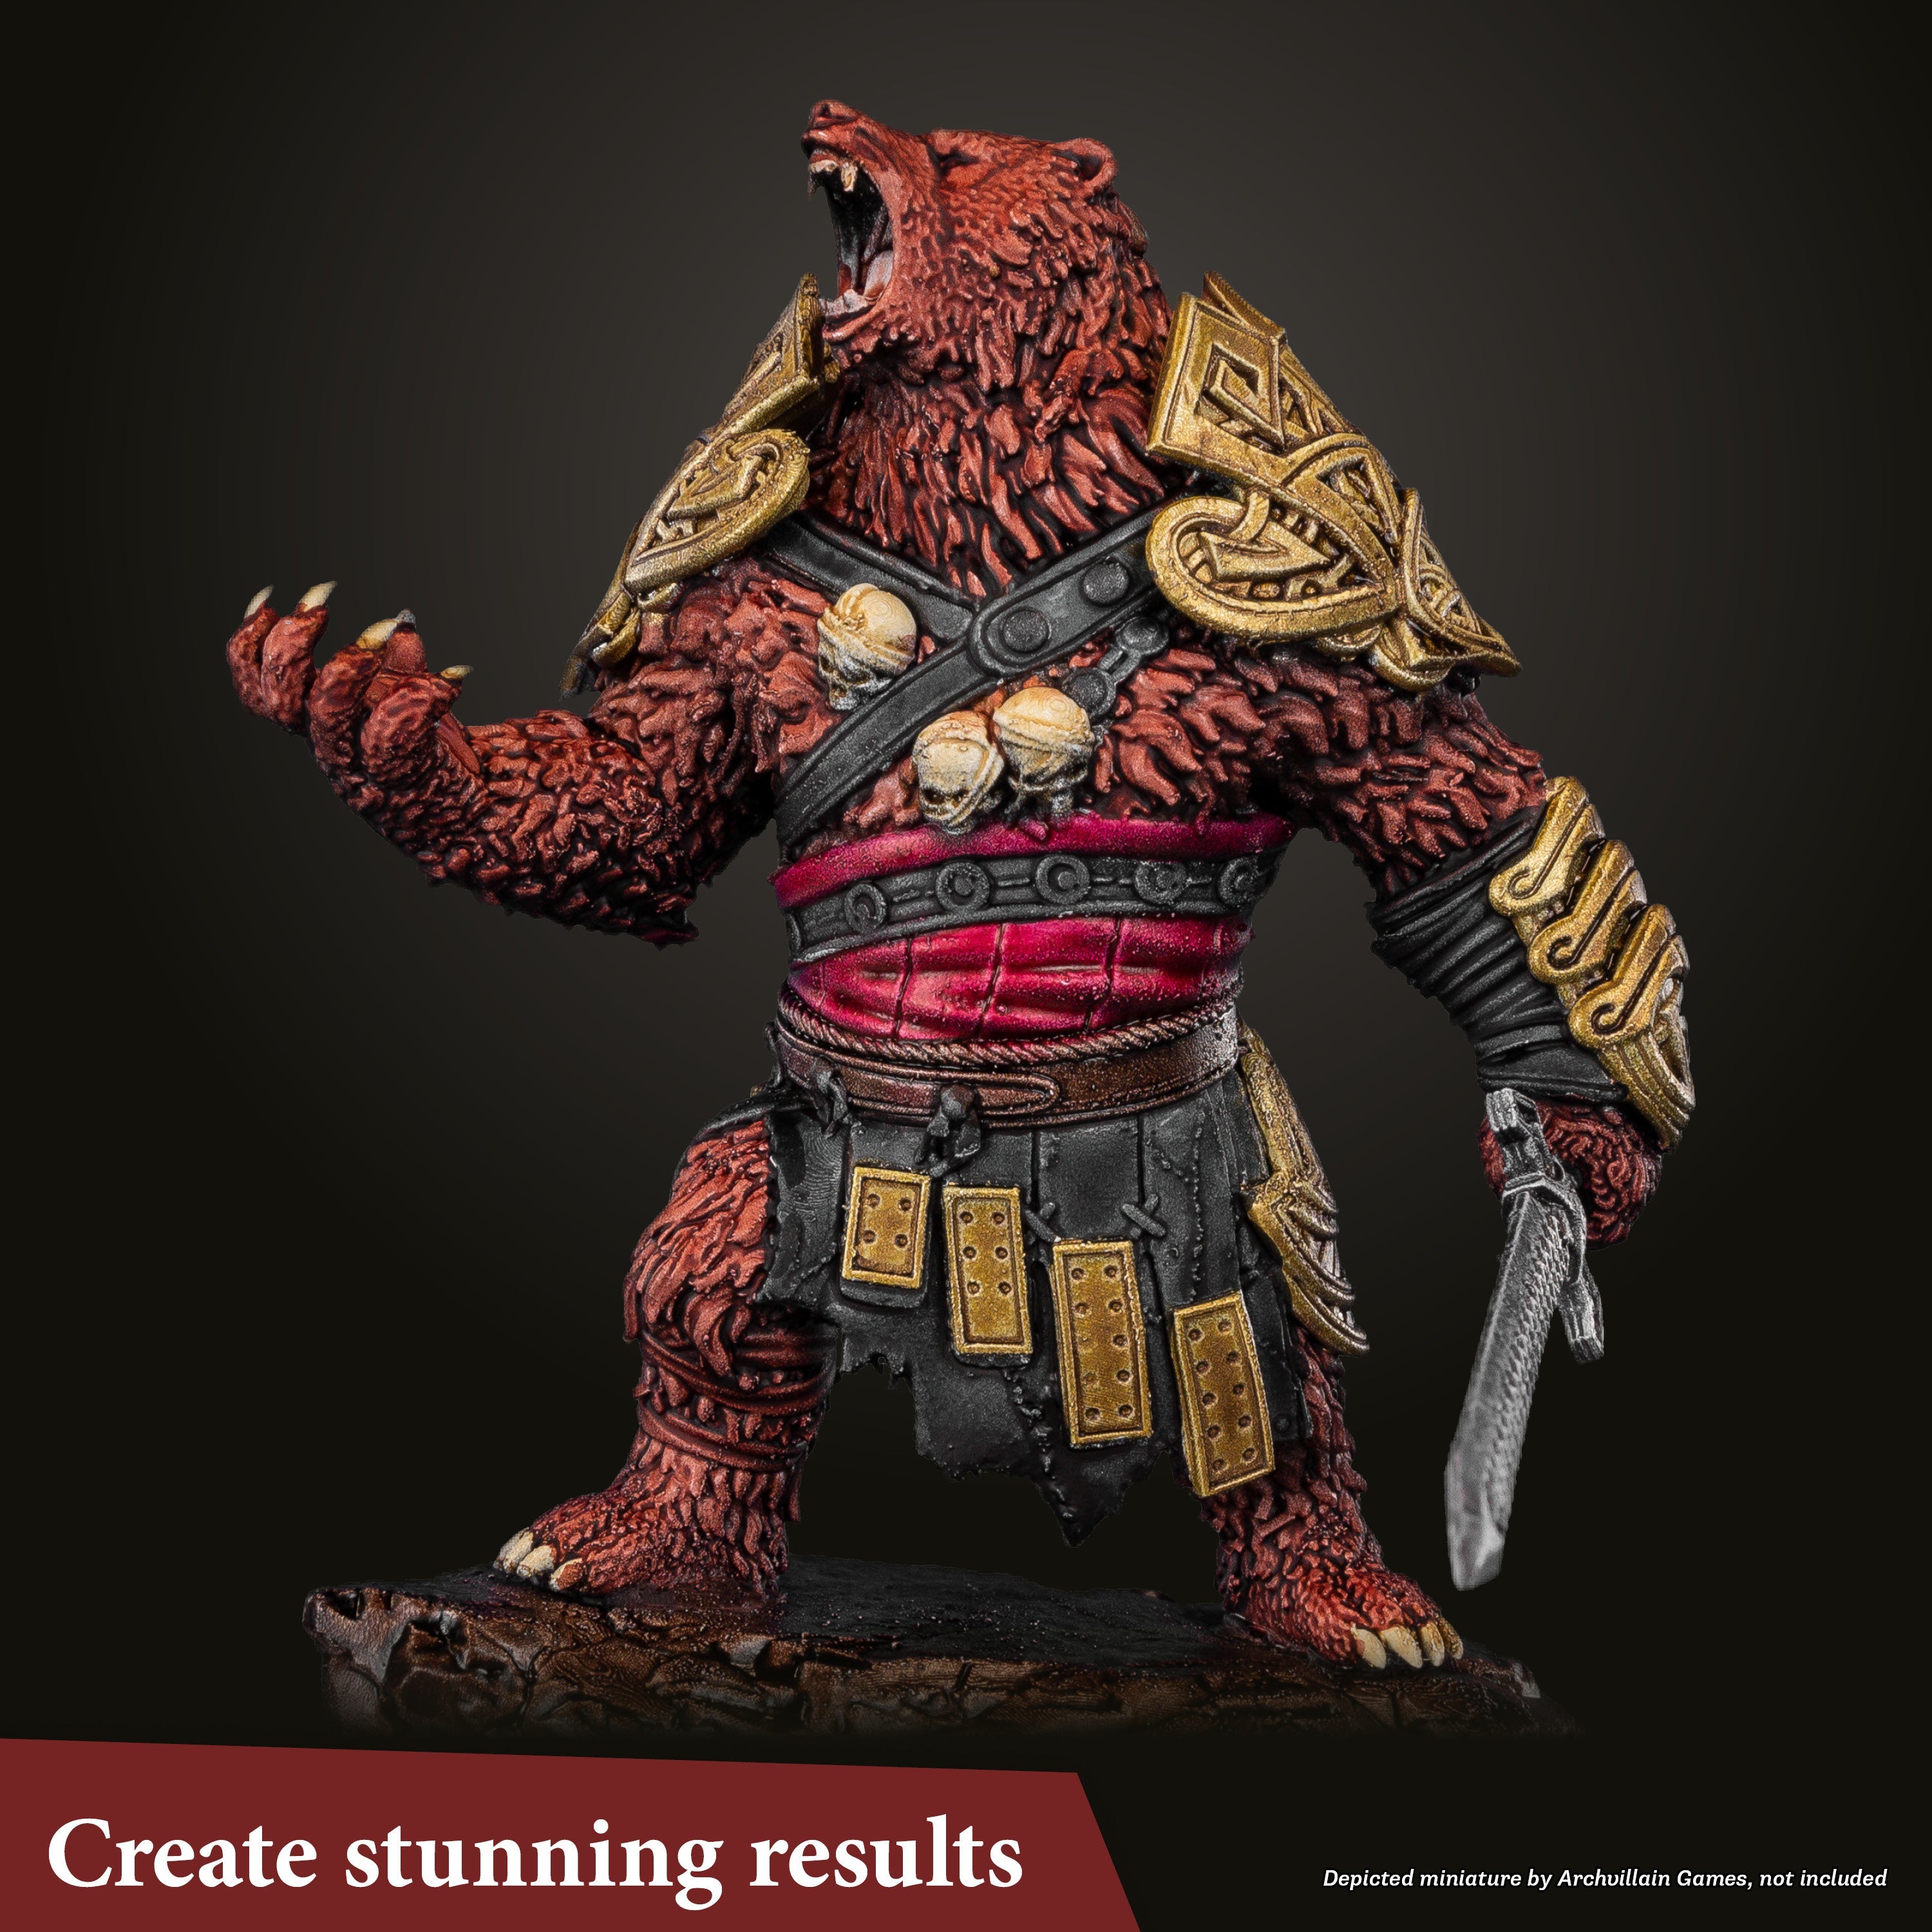
But Speedpaint 2.0 and its unique formula simplifies the traditional painting process, making it more accessible and less time-consuming while still delivering stunning results!
In this article, we’ll guide you through how to use Speedpaint 2.0 to paint beautiful-looking miniatures and models. So, grab your miniatures, set up your painting station, and get ready to transform those grey plastic minis into vibrant and stunning tabletop-ready pieces.
Let's get started!
Are you new to the hobby of painting miniatures?
Then we know the idea and prospect of painting intricate details on such small surfaces can be intimidating.
But Speedpaint 2.0 and its unique formula simplifies the traditional painting process, making it more accessible and less time-consuming while still delivering stunning results!
In this article, we’ll guide you through how to use Speedpaint 2.0 to paint beautiful-looking miniatures and models. So, grab your miniatures, set up your painting station, and get ready to transform those grey plastic minis into vibrant and stunning tabletop-ready pieces.
Let's get started!
What is Speedpaint 2.0?
Before we dive into the painting process, let’s take a closer look at what makes Speedpaint 2.0 unique compared to “traditional" acrylic paint.
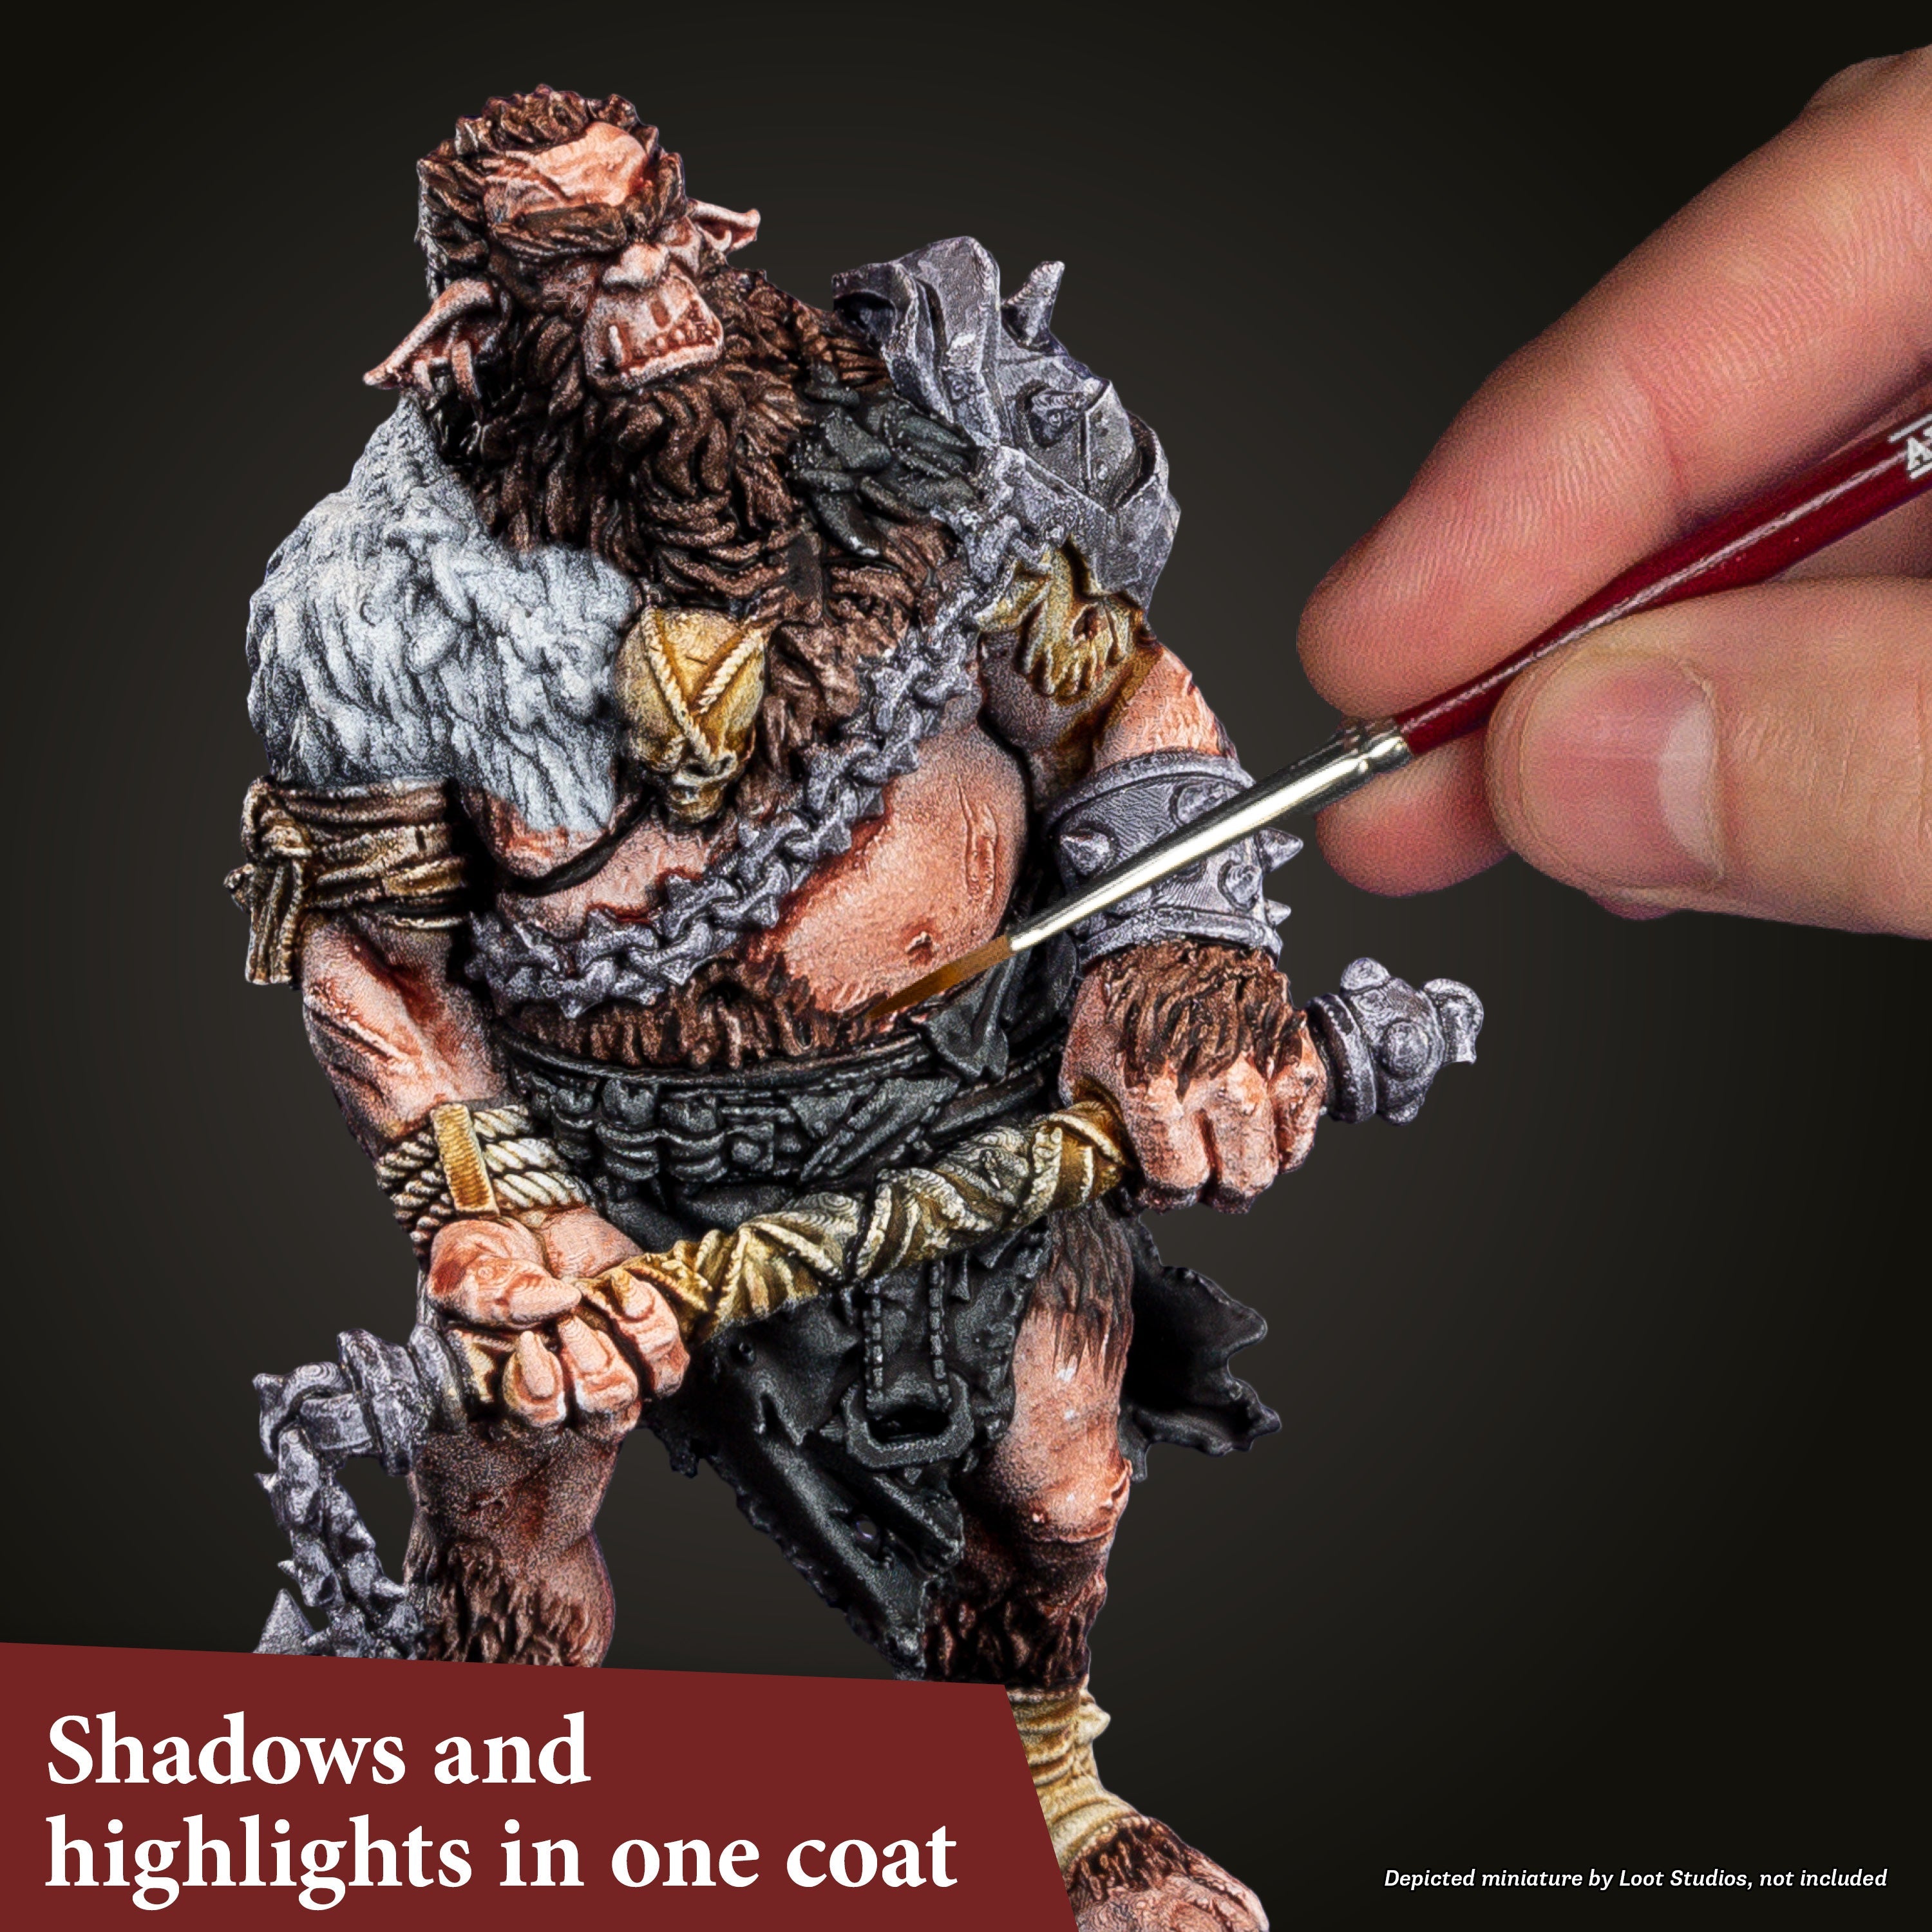
Speedpaint 2.0 is a one-coat painting solution. This means that in just one coat, it provides a base colour, intense shading, and highlighting effects. If you were to achieve the same result with traditional acrylic paints, it would require multiple layers and techniques for base coating, shading, and highlighting.
The reason why this is possible is due to its consistency and pigmentation. Speedpaint 2.0 is designed to flow smoothly over miniatures, settling into recesses to create natural shadows and highlights.
Speedpaint 2.0 is particularly user-friendly, especially for beginners or those looking to complete projects quickly. It eliminates the need for complex painting techniques and extensive colour
mixing, which are often necessary with traditional acrylics. Thus, you can achieve impressive results quickly.
What tools do you need?
So, what are the essential tools needed for painting miniatures with Speedpaint? Obviously, the answer to this question is a matter of preferences. But we recommend the following tools:
• Miniature figure
• Primer
• Brushes
• A palette or mixing tray
• Water for thinning and cleaning brushes
• Paper towels for blotting
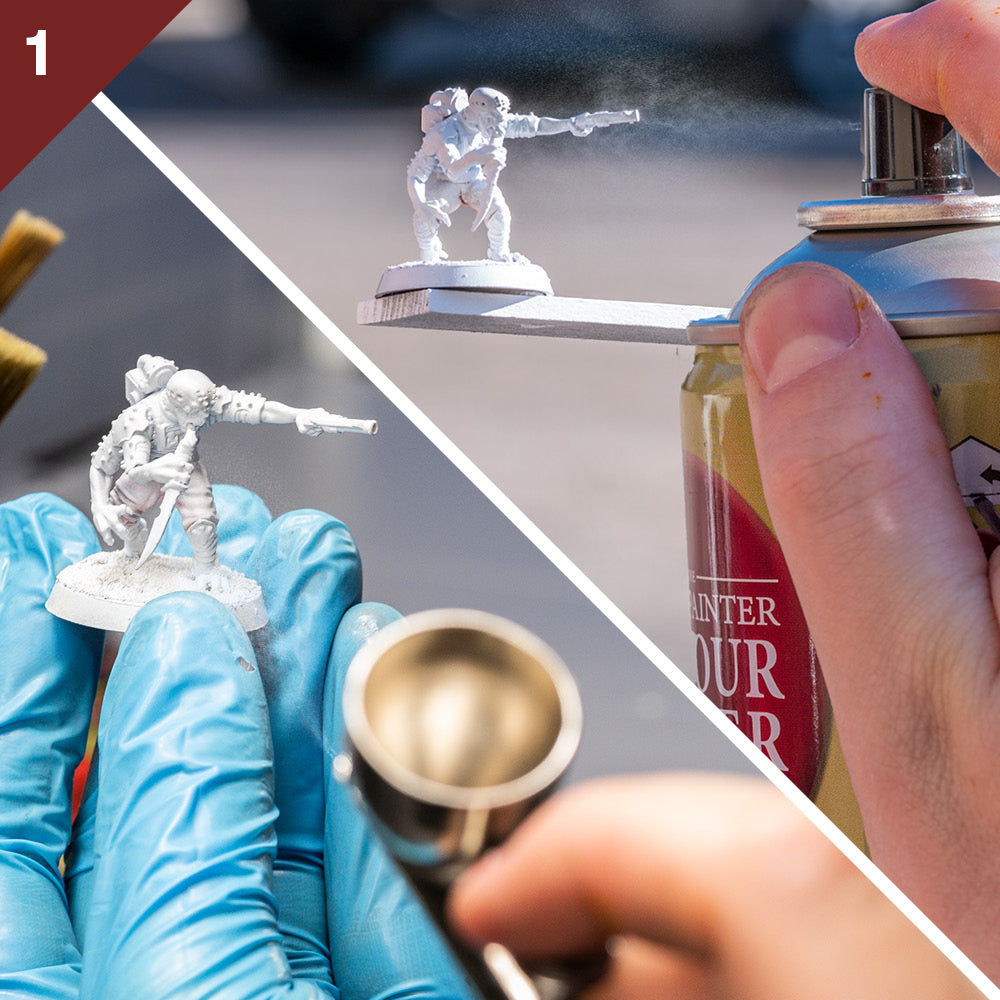
Prepare your mini
Before you start the process of painting your miniature, there’s a couple of things you need to do first.
First of all, you should always start out by cleaning your miniature to remove any dust or oils.
After that, apply a primer to ensure the paint adheres well. You can use one of our Colour Primers or our Airbrush Primer (Matt White, Matt Black, Matt Grey).
When you prime your figure, you create a rougher surface on the figure that allows the paint to adhere better and create more vibrant results.
We recommend using the Matt White Colour Primer as it creates the most vibrant colours on your final result. However, you can always experiment with the colour of the primer, depending on what you are trying to achieve and the tone of the overall army you are painting.
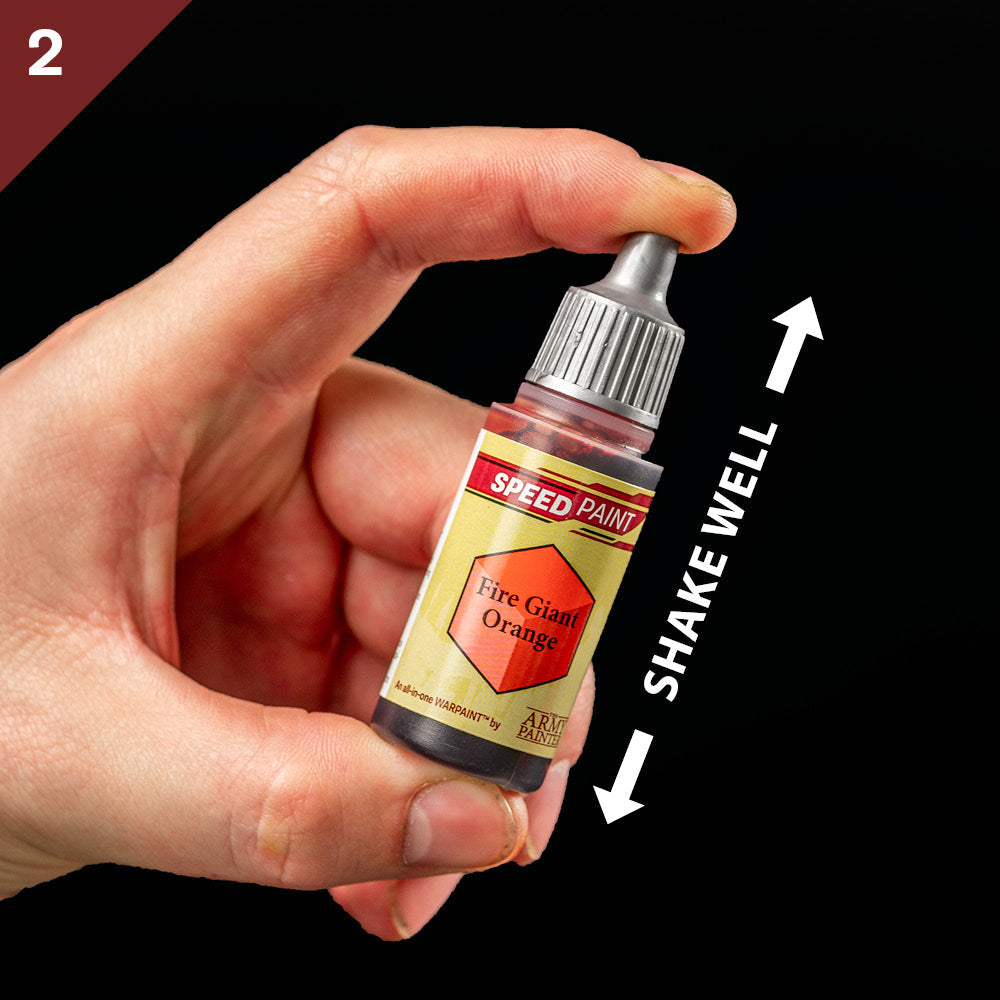
Shake!
Before you start painting with the Speedpaint, you must first shake the bottle thoroughly to mix your paints.
The Speedpaint 2.0 paints are heavily pigmented, but as pigment tends to sink to the bottom, it may look like your paint has separated.
The pre-loaded Mixing Balls help agitate the paint and blend these components back together.
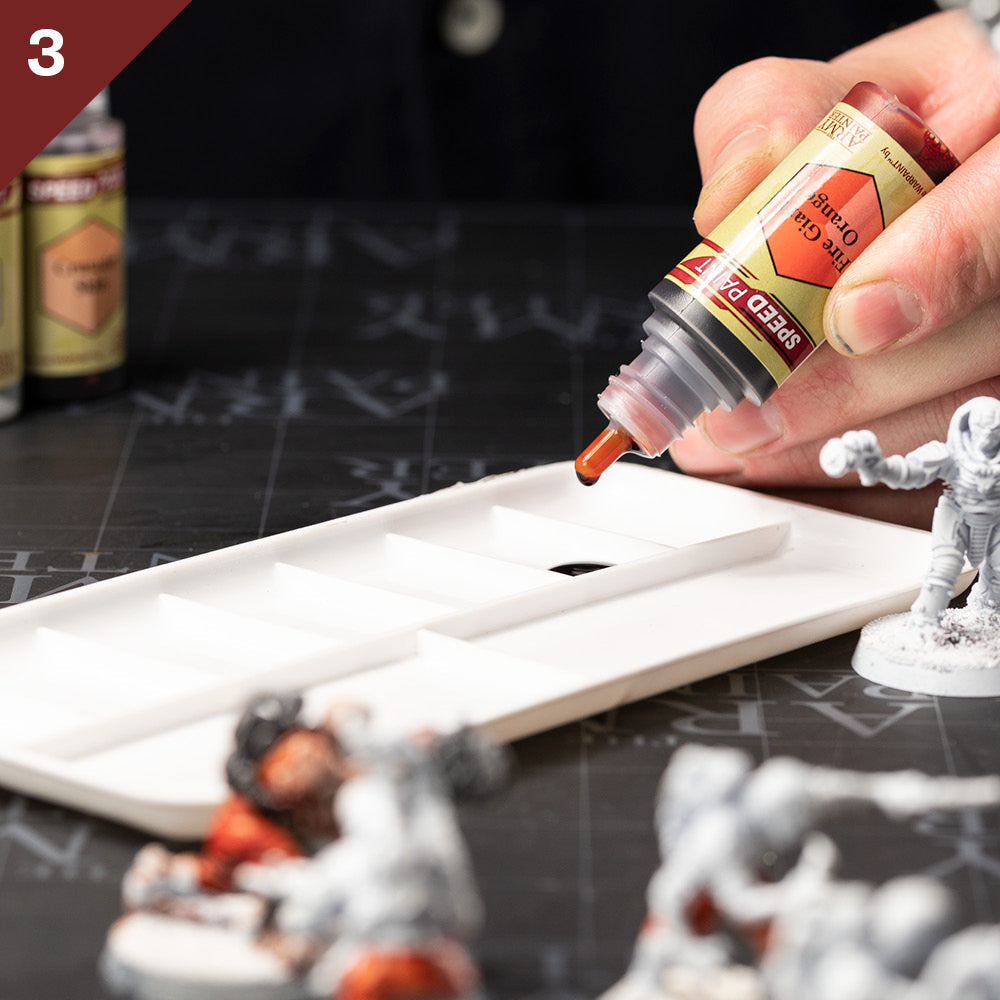
Use a Hard Palette
A hard palette is recommended for Speedpaint. For instance, the hard-plastic Paint Well Insert with 30 wells in the Wet Palette Wargamers Edition.
The Speedpaint is formulated to have a specific consistency that works directly from the palette. Using a hard palette or mixing tray helps maintain this consistency, as opposed to a wet palette which can introduce additional moisture and thin the paint, potentially altering its properties.
Also, if you use our Wet Palette, there’s a chance that the Speedpaint will bleed through the Hydro Sheet and stain your Hydro Foam.
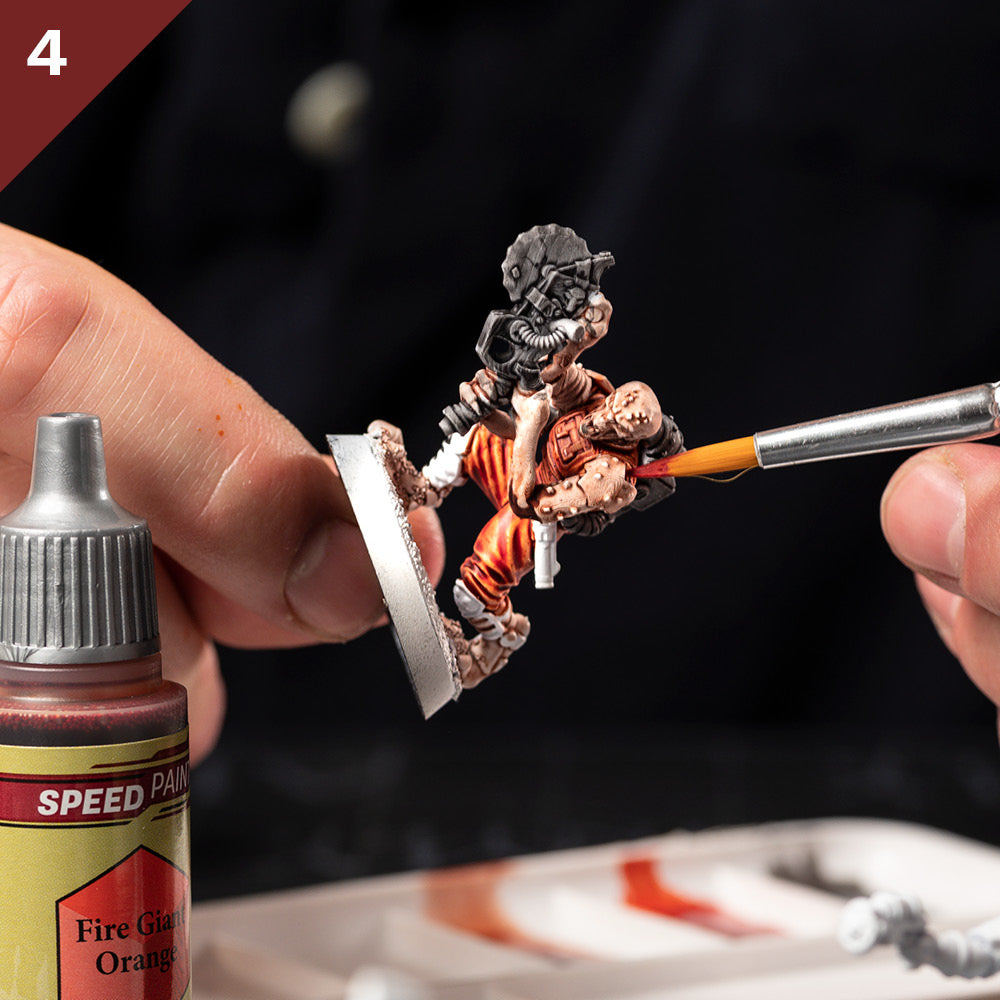
Paint your miniature
Load your brush with a liberal amount of Speedpaint and apply a generous coat over the desired areas, allowing the pigment to flow into the recesses and details of the miniature and let dry.
Don’t worry about painting “outside the lines”. You can always grab some regular Warpaint acrylic paint (matching the Colour Primer you’re using) and apply a couple of coats of the “mistake”.
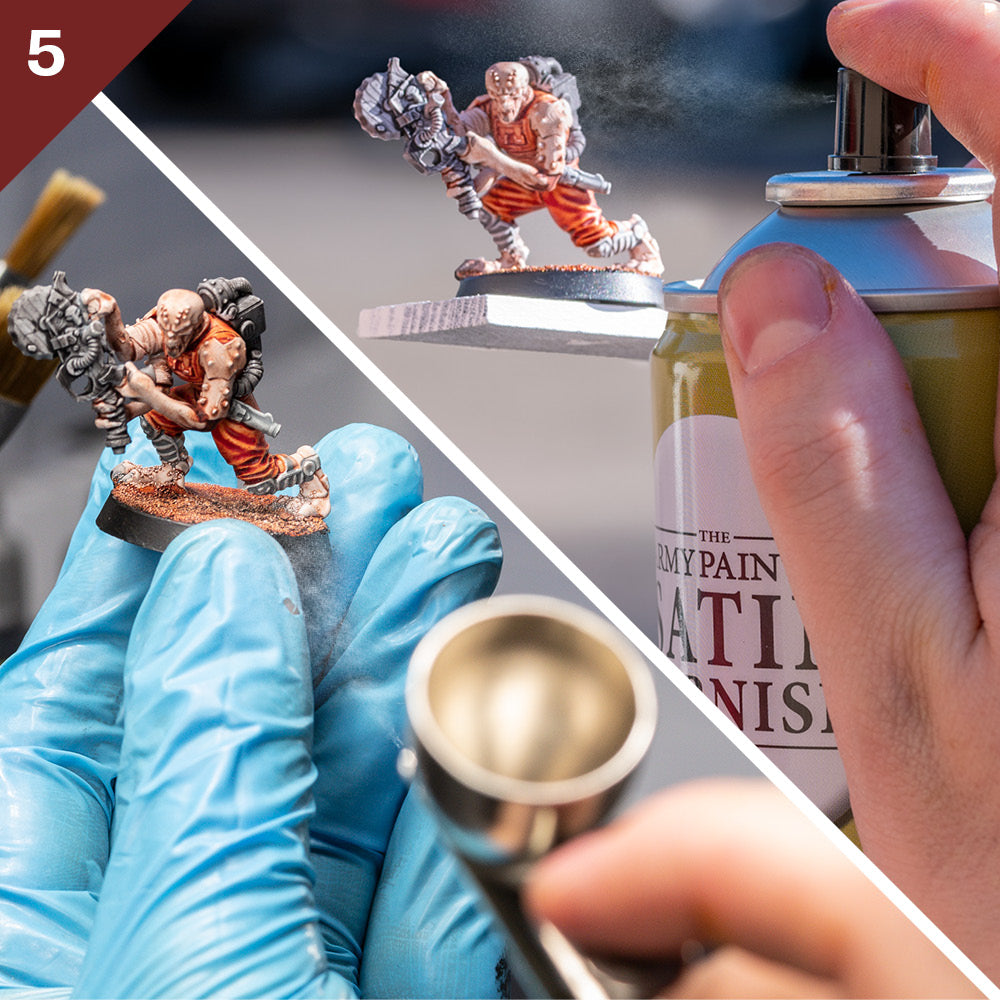
Protect your work
If you wish to add more layers or highlights with acrylic paints, we recommend applying a layer of varnish first.
A varnish acts as a sealant for the paint beneath it and thus protects the paint job from wear and tear, enhancing its durability.
Also, as varnishes come in different finishes (Satin and Anti-shine), this allows you to choose the final appearance of your miniature. For instance, the Aegis Suit Satin Varnish will leave a slight satin finish on your model, while the Anti Shine Matt Varnish tones down the sheen if a matt finish is desired.
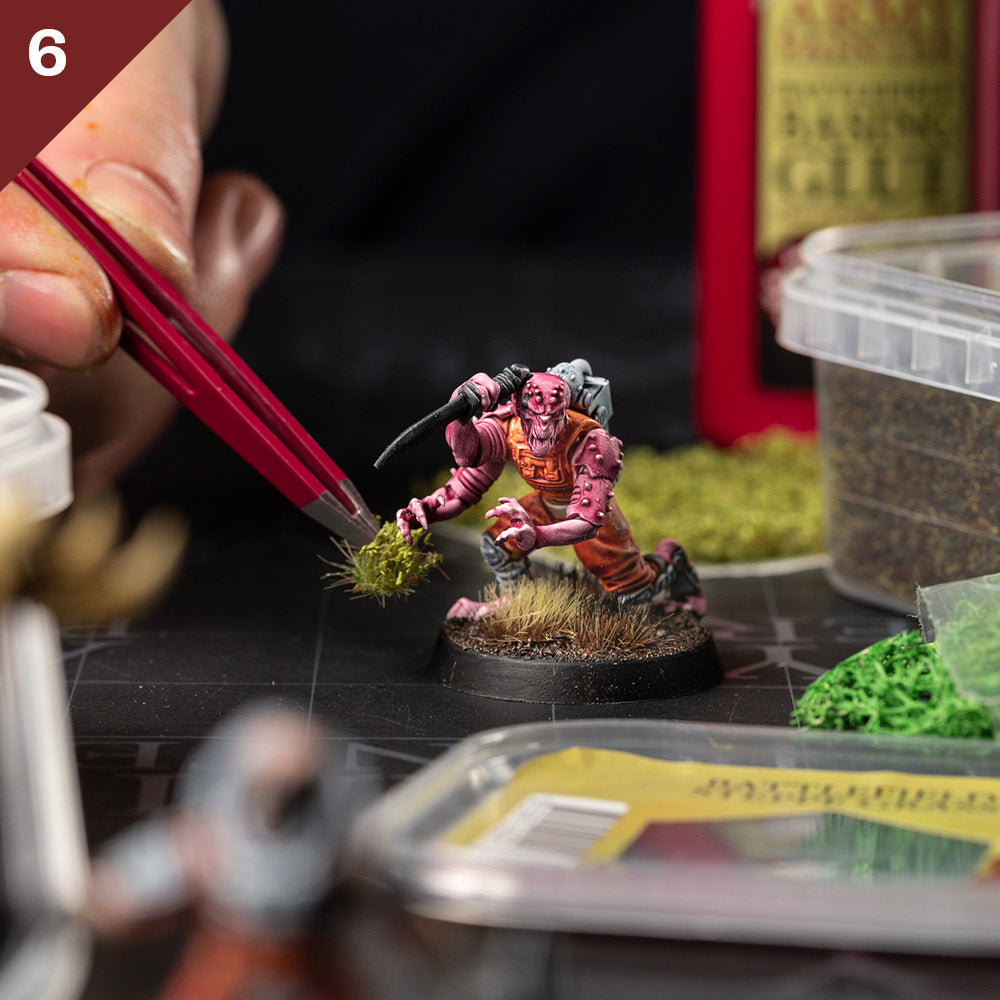
Finishing touches
All done!
For extra details and really bringing your miniature to life, finish the base off using the many different Tufts and basing materials from our Battlefields Basing range.
Prepare your mini
Before you start the process of painting your miniature, there’s a couple of things you need to do first.
First of all, you should always start out by cleaning your miniature to remove any dust or oils.
After that, apply a primer to ensure the paint adheres well. You can use one of our Colour Primers or our Airbrush Primer (Matt White, Matt Black, Matt Grey).
When you prime your figure, you create a rougher surface on the figure that allows the paint to adhere better and create more vibrant results.
We recommend using the Matt White Colour Primer as it creates the most vibrant colours on your final result. However, you can always experiment with the colour of the primer, depending on what you are trying to achieve and the tone of the overall army you are painting.
Shake!
Before you start painting with the Speedpaint, you must first shake the bottle thoroughly to mix your paints.
The Speedpaint 2.0 paints are heavily pigmented, but as pigment tends to sink to the bottom, it may look like your paint has separated.
The pre-loaded Mixing Balls help agitate the paint and blend these components back together.
Use a Hard Palette
A hard palette is recommended for Speedpaint. For instance, the hard-plastic Paint Well Insert with 30 wells in the Wet Palette Wargamers Edition.
The Speedpaint is formulated to have a specific consistency that works directly from the palette. Using a hard palette or mixing tray helps maintain this consistency, as opposed to a wet palette which can introduce additional moisture and thin the paint, potentially altering its properties.
Also, if you use our Wet Palette, there’s a chance that the Speedpaint will bleed through the Hydro Sheet and stain your Hydro Foam.
Paint your miniature
Load your brush with a liberal amount of Speedpaint and apply a generous coat over the desired areas, allowing the pigment to flow into the recesses and details of the miniature and let dry.
Don’t worry about painting “outside the lines”. You can always grab some regular Warpaint acrylic paint (matching the Colour Primer you’re using) and apply a couple of coats of the “mistake”.
Protect your work
If you wish to add more layers or highlights with acrylic paints, we recommend applying a layer of varnish first.
A varnish acts as a sealant for the paint beneath it and thus protects the paint job from wear and tear, enhancing its durability.
Also, as varnishes come in different finishes (Satin and Anti-shine), this allows you to choose the final appearance of your miniature. For instance, the Aegis Suit Satin Varnish will leave a slight satin finish on your model, while the Anti Shine Matt Varnish tones down the sheen if a matt finish is desired.
Finishing touches
All done!
For extra details and really bringing your miniature to life, finish the base off using the many different Tufts and basing materials from our Battlefields Basing range.

ACHIEVING PRIME RESULTS REQUIRES THE RIGHT PRIMER
Below, you can see how the colour of the primer results in different unique results:
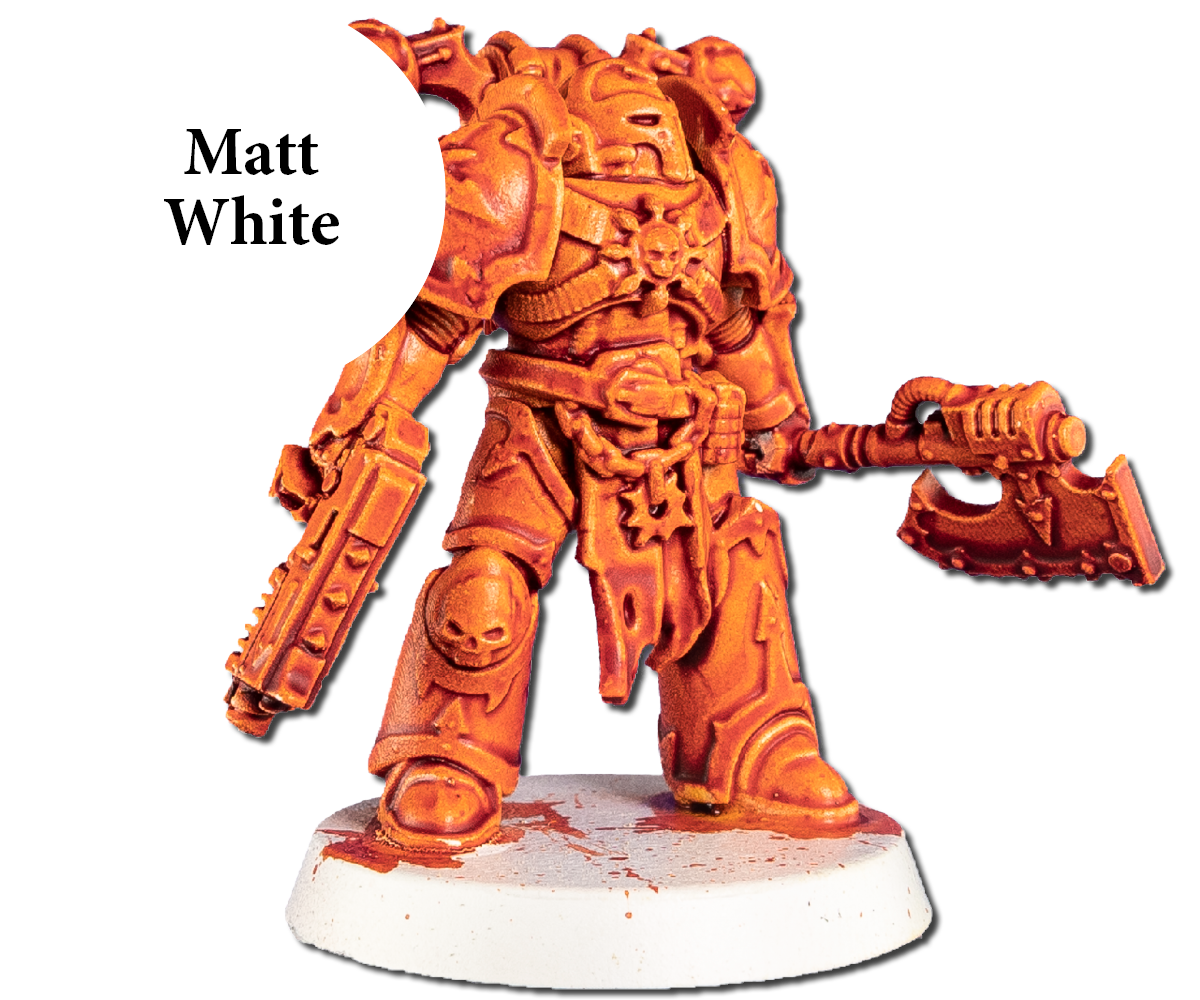
Colour Primer Matt White yields the most vibrant colours.
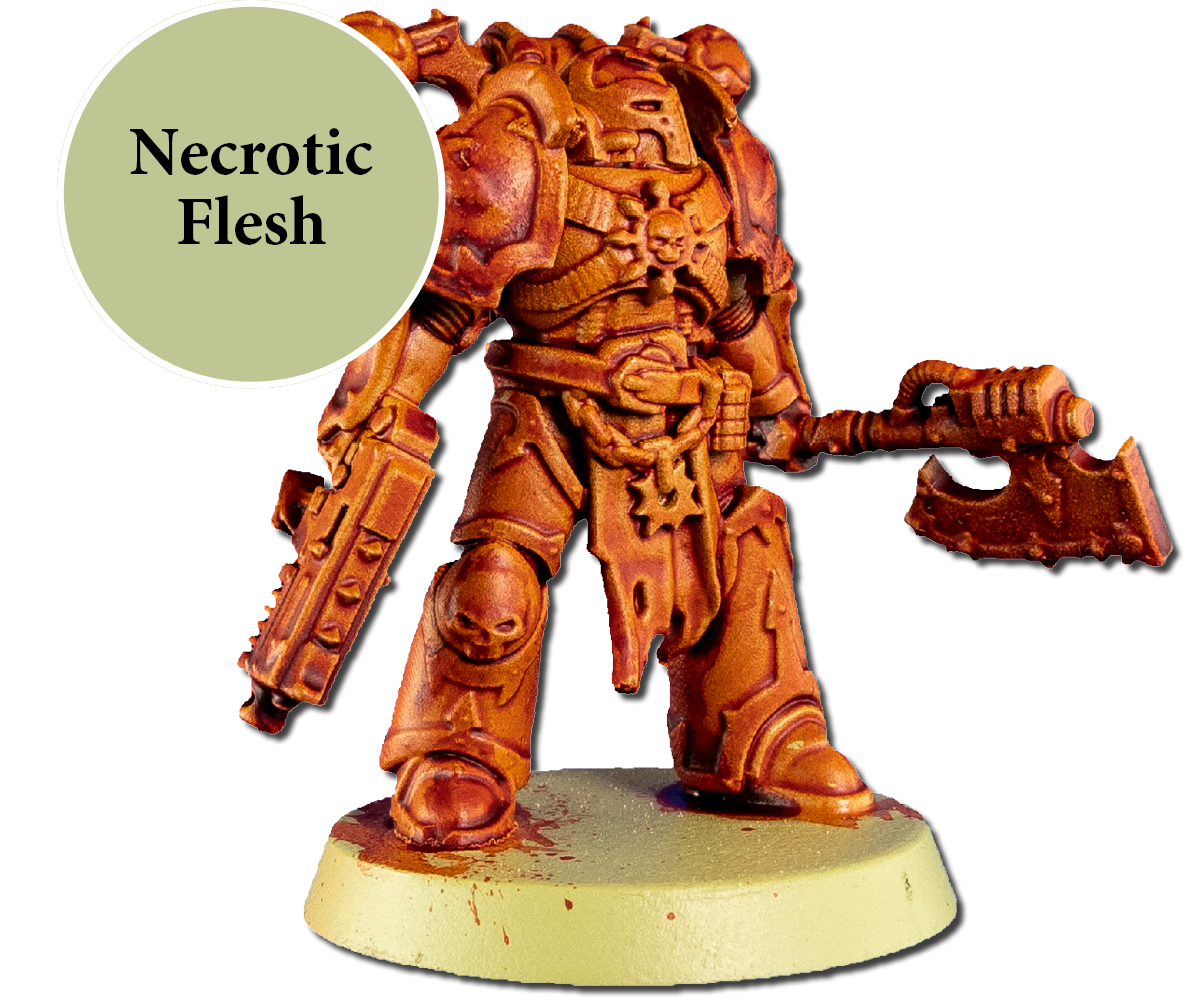
The pale green of Necrotic Flesh develops a more muted, de-saturated effect.
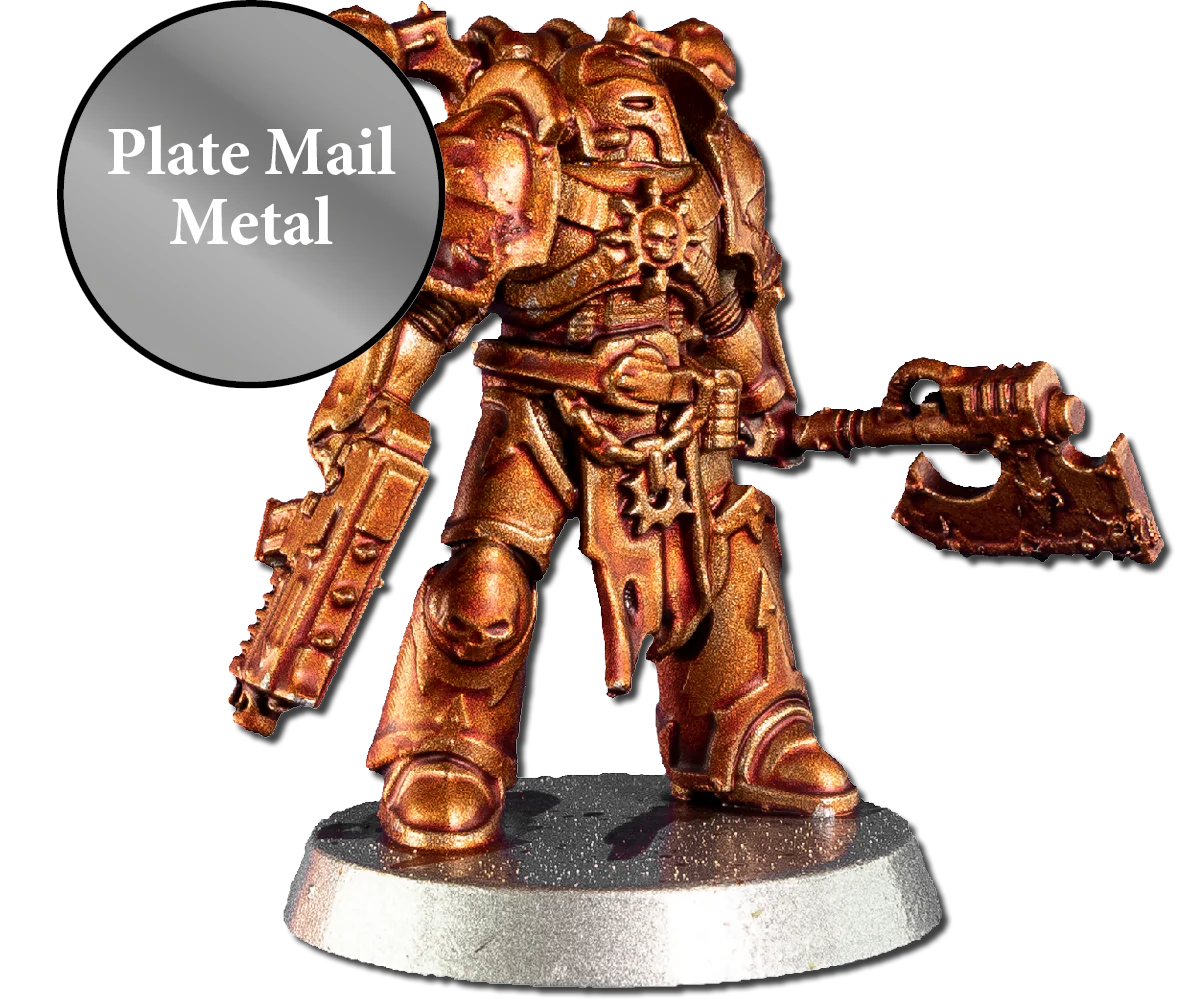
Speedpaint really shines when applied over Plate Mail Metal.

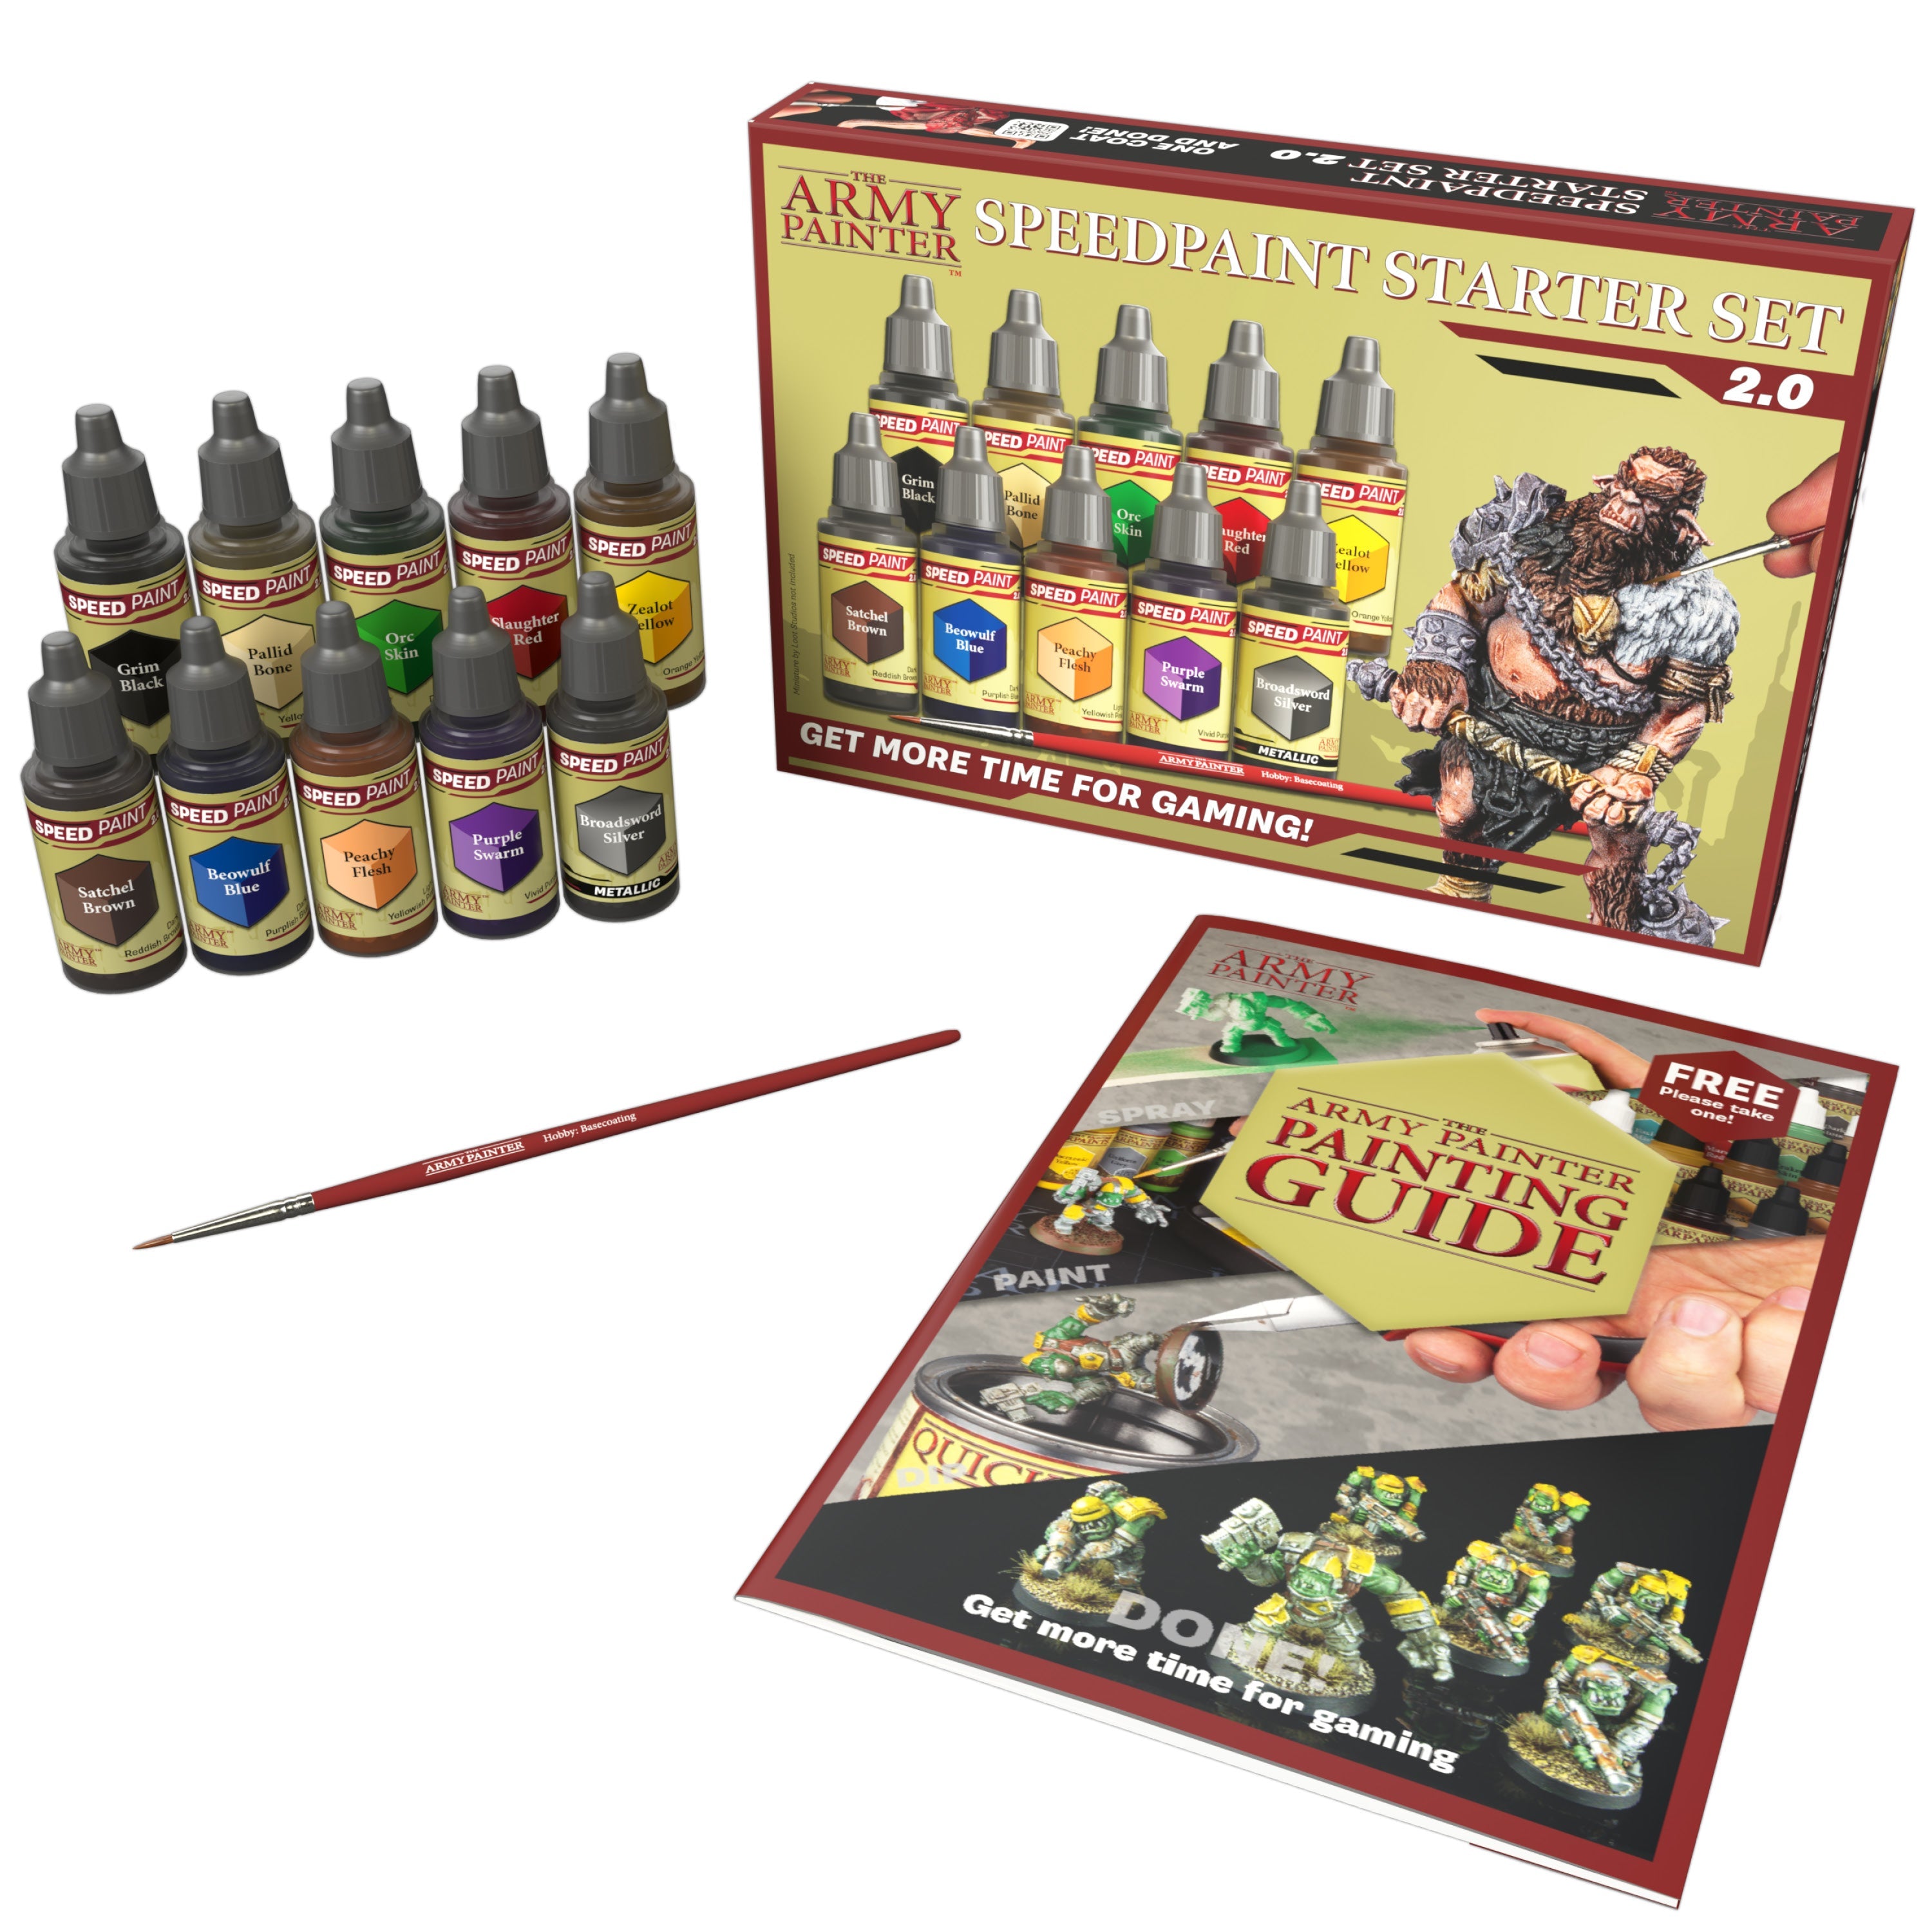


Speedpaint Starter Set 2.0
Remember, every master painter started as a beginner, and with the Speedpaint Starter Set 2.0, your path to becoming a skilled miniatures painter is clearer and more achievable than ever.
The key takeaway from this “Speedpaint How To” is that anyone can paint miniatures. With Speedpaint 2.0 and the various Speedpaint 2.0 Box Sets, the process is simplified, making it less about mastering complex techniques and more about enjoying the creative process.
These paints are designed to help you achieve impressive results with less effort and time, perfect for those who are just starting out or those with busy schedules.
Share your creations with us on social media!
We’d love to see your painted miniatures. Share your creations with us by tagging us on social media or using the #thearmypainter hashtag.